item3
item10 item10c item2 item3d item10c1 item10c2 item10c3
mk books

Freebies - Hints & Tips
Zipper Facing with Tucked Edge

This zipper treatment is in Workshop Handouts - Volume 3 on Page 45. However I made a mistake with the Brother instructions for achieving the tucked stitch so the corrected version is given here. If you have a copy of Volume 3, please print this out and insert it into your book. My sincere apologies for the error and my thanks to Lois for bringing it to my attention.

zipper

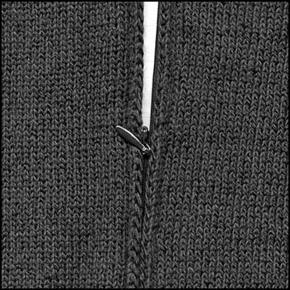
This zipper trim creates a facing with a foldline. The zipper teeth are covered by the edges.

At the bottom of the zipper opening, e-wrap cast on 5 stitches (approx. 2 cm/.8") on the zipper side. On every other row, pull the fifth stitch from the edge to hold and knit with the carriage set to tuck to the left and knit to the right. (Studio/Singer, left russel lever to I and right russel lever to II.)

• Brother instructions: pull the fifth needle to E position with the carriage set to hold. Knit to the left. Push the needle to D and knit to the right. Repeat these two rows for the length of the facing. In this way, the fifth stitch from the edge will be tucked on every other row and knit on the alternate rows.

Fold along the tucked stitch and stitch to the zipper tape covering the teeth.

© Eileen Montgomery 2003-2006

Home | Bio | Contact Page | Machine Knitting Books | Freebies | MK Links | Beadwork

gartercarriage1 beaded2 mittens2 vol3a vol2a vol1c midgauge2 afghans2 babys2 preschoolers2 crafts2 mk books